AI-Powered Summary
Here in this documentation, we’ll guide you through how to use and customize the assistant widget for your WordPress documentation using weDocs.
weDocs assistant widget has three major parts:
- Explore
- Messaging
- Appearance
Let’s check out them one by one!
How to customize the Assistant Widget of WordPress documentation
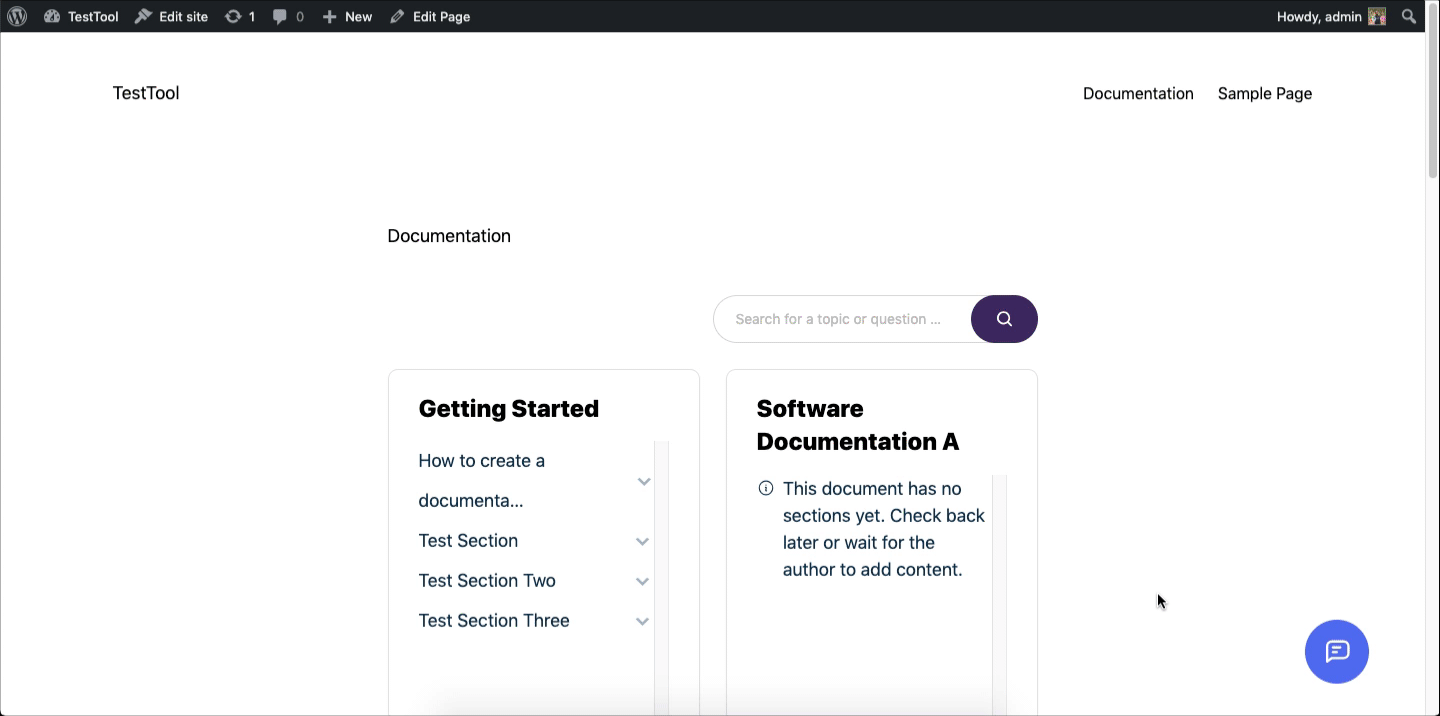
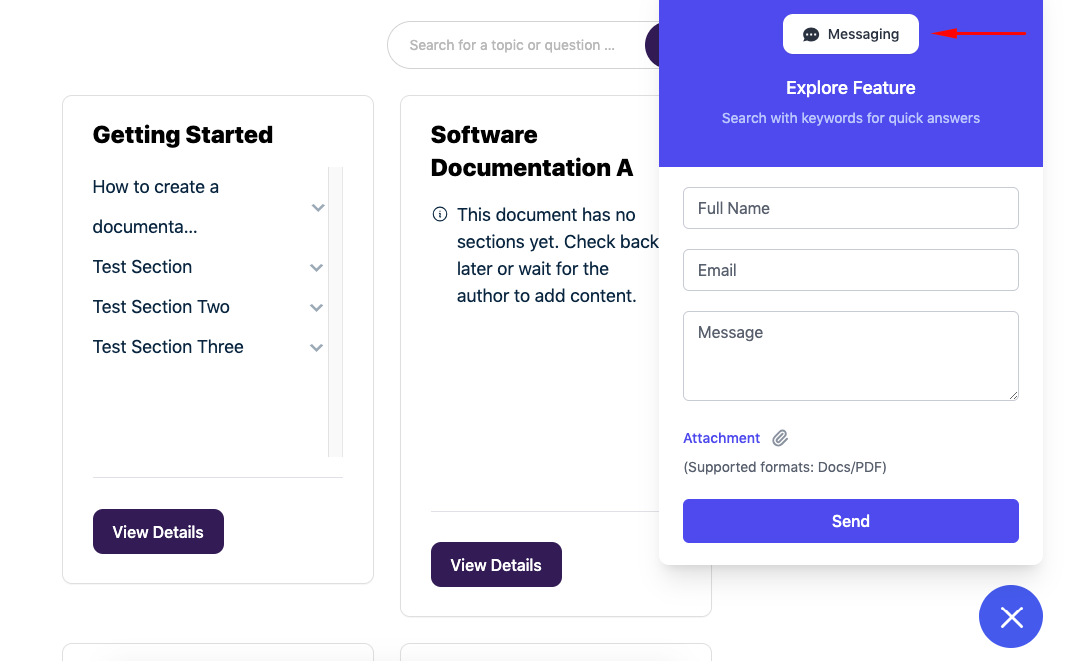
Here’s the front overview of the assistant widget!
Activating/deactivating the assistant widget
You can activate or deactivate the assistant widget right from here. Just enable or disable the button. It will not appear on your documentation site. But don’t forget to hit the save button after changing any option!
Here’s the frontend overview of the assistant widget after deactivating it. See it’s appearing here!

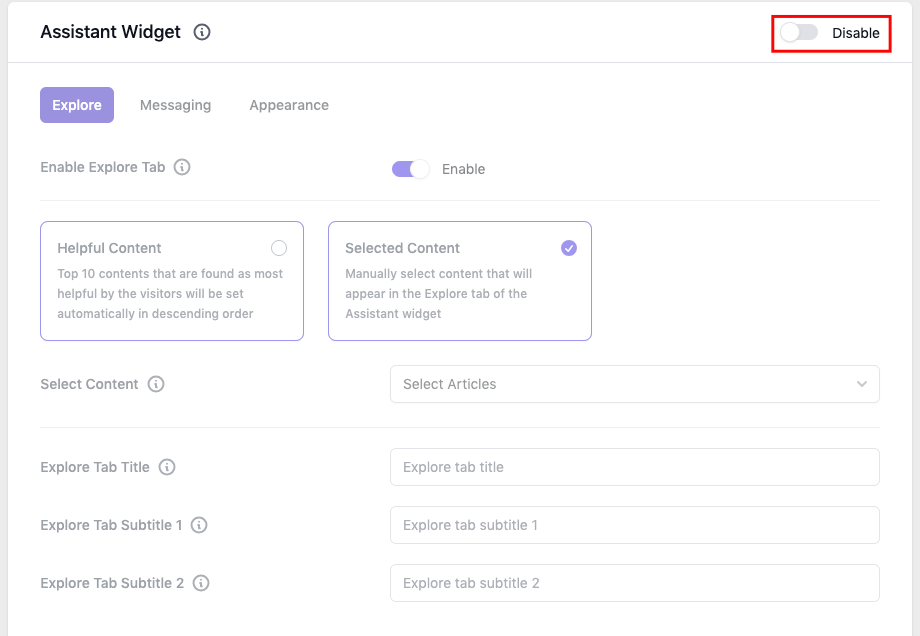
Also, you can individually turn off each section. Here we have disabled the “explore.” tab.
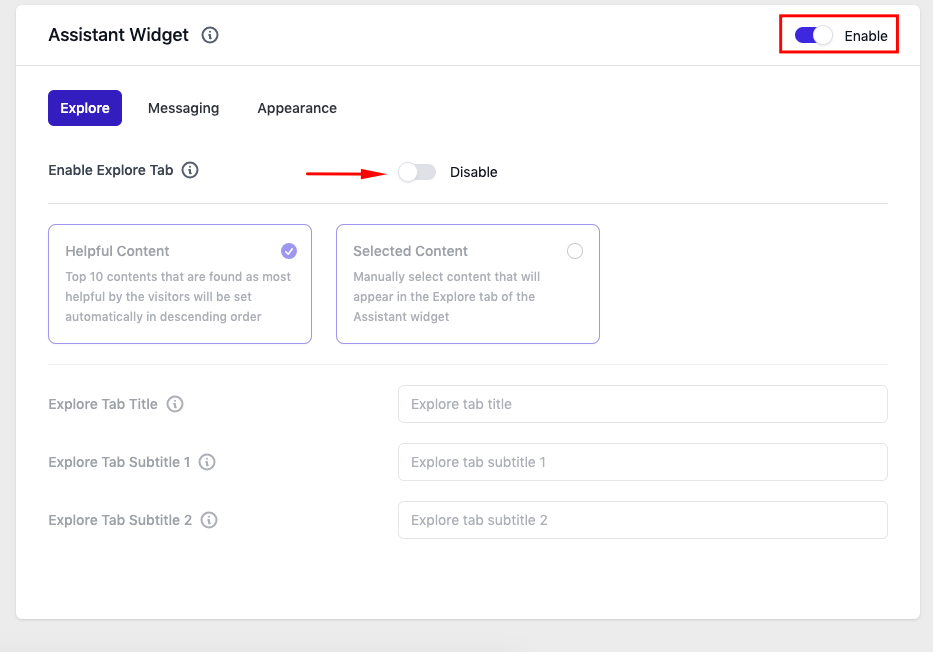
Now let’s see how it will appear on site. Here you can see the “explore” tab is not appearing.
Please note: This setting is similar to the messaging option. Just disable the messaging option; it will show only the “explore” tab instead of messaging.
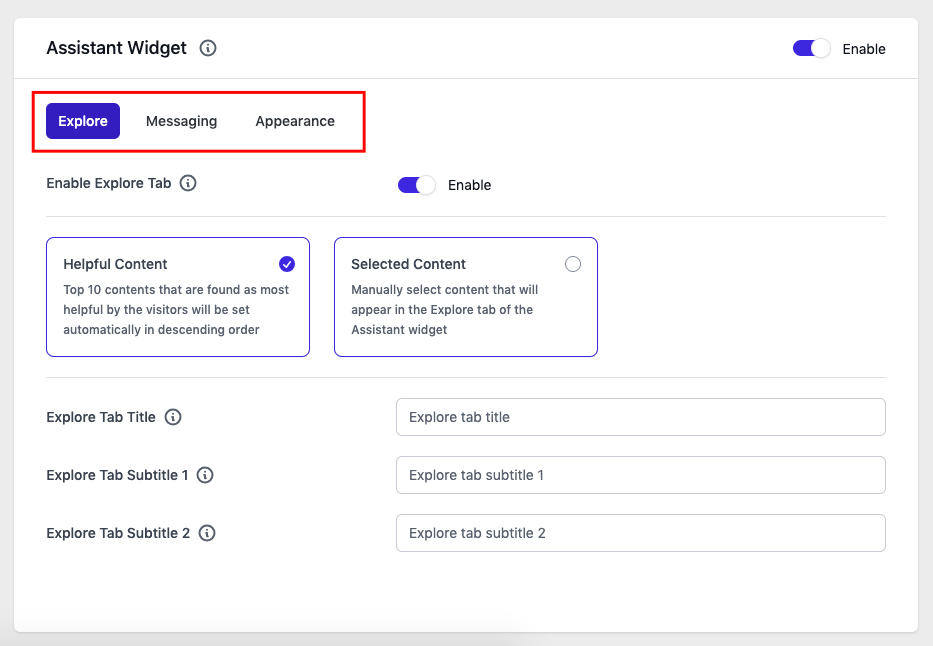
Customizing the Explore Tab
On the upper section of the “explore tab” settings, you’ll find two options.
- Helpful content: Depending on which articles the visitors deem to be the most useful, the Explore Tab will display the top 10 articles. It will be set automatically in descending order.
- Selected content: Or, you can manually select which content will appear in the Explore Tab of the Assistant widget
- Explore tab title: Title of the explore tab
- Explore tab subtitle: Subtitle of the explore tab
- Explore tab subtitle 2: Second title of the explore tab

